- Home
- Knowledge Base
- Contact Groups in UCx for Desktop
Contact groups enable you to gather your contacts in any manner you choose. For example, you could create a group for a department or for the employees of another office.
These instructions explain how to manage groups in the UCx for Desktop client. The groups you create here will also be visible in the mobile UCx applications.
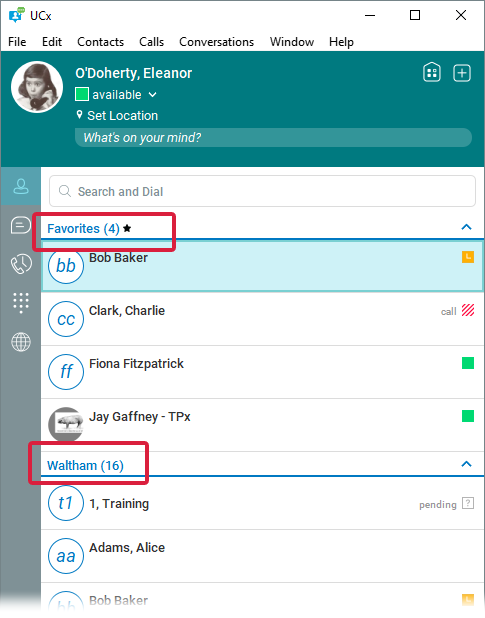
All the groups you create are displayed at the top of the Contacts list, above the default My Contacts group. A group is indicated with a blue header containing the name of the group and the number of members. Members of your custom groups will also still appear in the My Contacts group.

Add a Group
Click Add ![]() at the top of the window. In the New… tab that opens, select New Group
at the top of the window. In the New… tab that opens, select New Group ![]() . Enter a Group Name and click the Add to Contacts button. If you make a mistake in the Group Name field and want to start over, click the Clear All button.
. Enter a Group Name and click the Add to Contacts button. If you make a mistake in the Group Name field and want to start over, click the Clear All button.
Add a Contact to a Group
Right-click on the contact in the Contacts list, hover over Add to Group, then select the name of the group.
A contact can be a member of more than one group.
Edit a Group
To rename a group: right-click on the group’s header and select Edit <Group Name>. Enter a new name and click OK, or click Cancel to exit without saving.
To remove a contact from a group: right-click on the contact, hover over Remove from Group, then select the name of the group.
To reorder a group on the Contacts list: right-click on the group’s header and select Move Up, Move Down, Move First, or Move Last. The options displayed will vary depending on the group’s current position.
Group Actions
Right-click on the group’s header and select Chat or Invite to My Room to start a group chat or call with the members of the selected group.
Delete a Group
Deleting a group does not delete the members of that group from your contact list. They will still appear in the default My Contacts group.
Right-click on the group’s header and select Remove <Group Name>. You are prompted to confirm the deletion.
